Fix Screenshot Not Working In Windows 11
In this article, we’ll look at how to fix screenshots that aren’t working in Windows 11.
1 Fix Screenshot Not Working In Windows 111.1 Use The Keyboard Shortcut To Take Screenshot1.2 Try Restarting The Snipping Tool App1.3 Allow Snipping Tool App To Run In The Background1.4 Run SFC Scan1.5 Run Windows App Troubleshooter1.6 Try Repairing/Resetting The App2 Final Words
Use The Keyboard Shortcut To Take Screenshot
You can take screenshots on Windows 11 using the keyboard shortcut. You can press the Windows + Shift + S key combo, and this will allow you to take a screenshot on your PC. If you cannot use the Snipping Tool app on your PC, you can try using this keyboard shortcut to take the screenshot.
Try Restarting The Snipping Tool App
Another thing that you can try doing is restarting the Snipping Tool app. If you have been facing issues with the app due to which screenshot is not working in Windows 11, you should try restarting the Snipping Tool app. To do so, follow the steps given below-
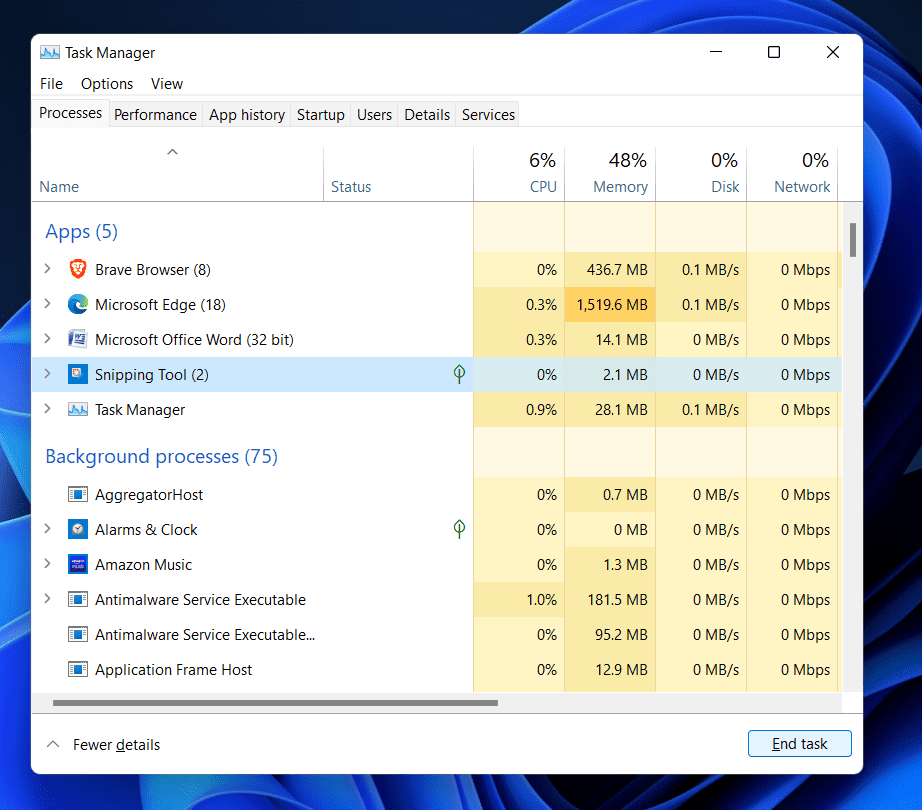
Firstly, open the Task Manager on your PC by pressing the Ctrl + Shift + Esc. In the Processes tab in the Task Manager, search for the Snipping Tool. Select Snipping Tool and then click on End Task.
Once done, open the Start Menu and then search for the Snipping Tool. Click on the Snipping Tool to open it.
You should now be able to use the Snipping Tool. However, if the screenshot is not working in Windows 11, you should move to the next troubleshooting step.
Allow Snipping Tool App To Run In The Background
If you cannot take screenshots on the Windows 11 PC, you will have to allow the snipping tool app to run in the background. To allow the Snipping Tool app to run in the background, follow the steps given below-
Press the Windows + I key combo to open the Settings app on your PC.Click on the Apps section on the left sidebar of the Settings app, and then on the right side, click on the Apps & features option.
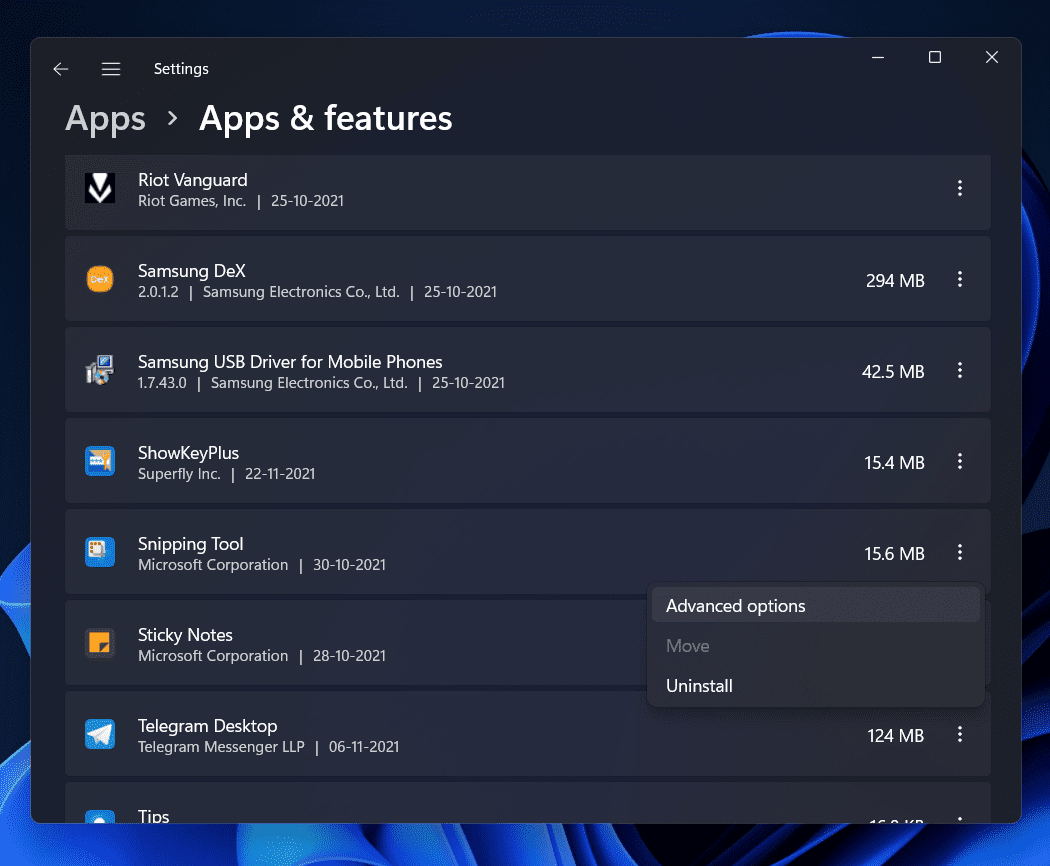
From the list of applications, search for the Snipping Tool. Click on the three dots (three ellipses) right beside the Snipping Tool. From the menu that opens up, click on Advanced Options.
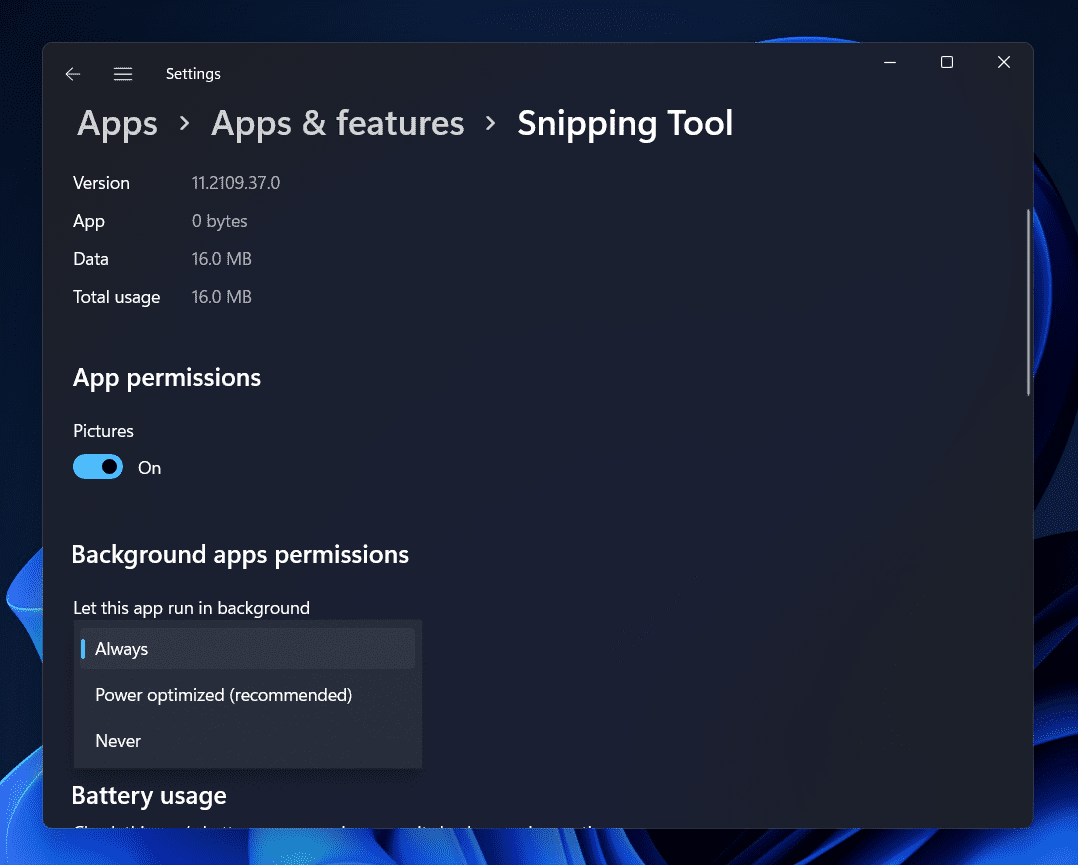
Click on the drop-down menu right below the Background App Permissions, and from the list of options, select Always.
After doing so, try running the Snipping Tool app again on your PC. This time, you should be able to use it without any issue.
Run SFC Scan
If you have been facing issues with the Snipping Tool app and cannot take screenshots in Windows 11, you should try running the SFC scan on your PC. SFC scan analyzes your PC for errors due to corrupt and damaged files and fixes them. To run the SFC scan, follow the steps given below-
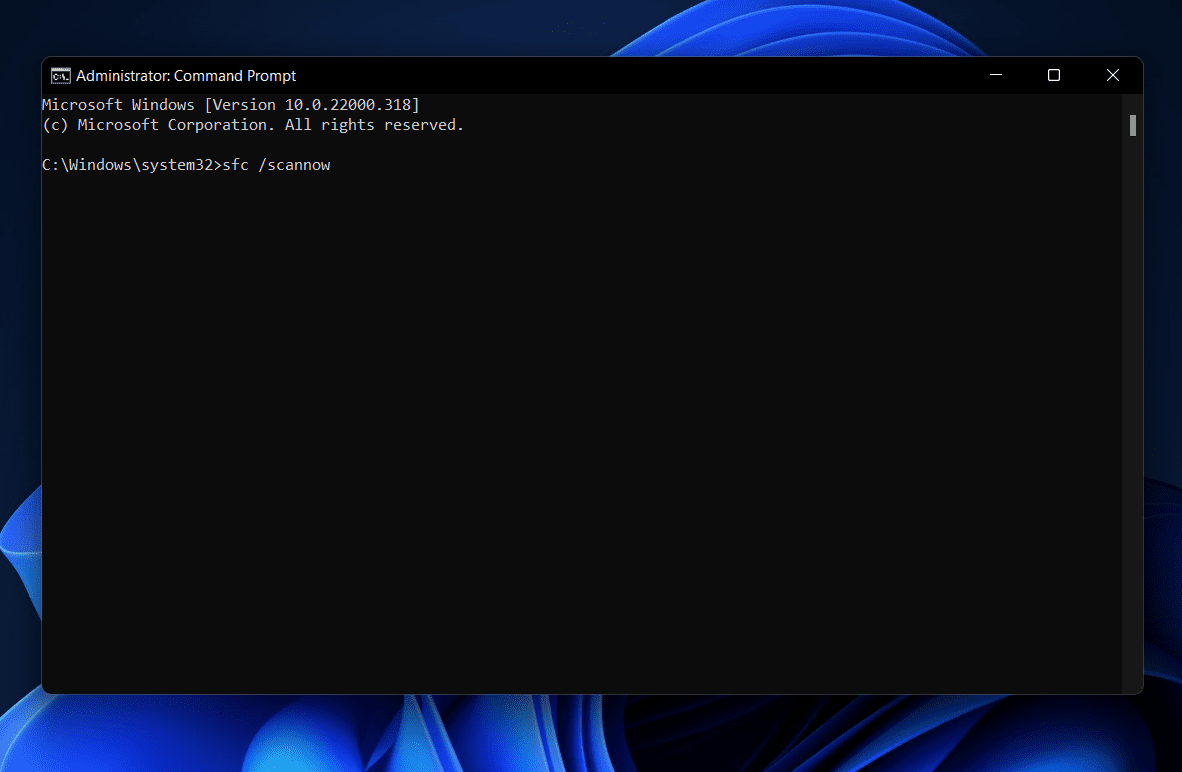
In the Start Menu, search for CMD. Select Command Prompt, and then click on Run as Administrator. In the Command Prompt, type the command sfc /scannow and then hit Enter to run the command.
This will scan your PC for issues. Once done, close the Command Prompt and restart your PC.
Now try taking the screenshot again, and you should be able to do it without any problem.
Run Windows App Troubleshooter
Another thing that you can try doing is running the Windows App troubleshooter. Windows App troubleshooter will identify problems associated with the apps on your PC and fix them. To run the Windows App troubleshooter, follow the steps given below-
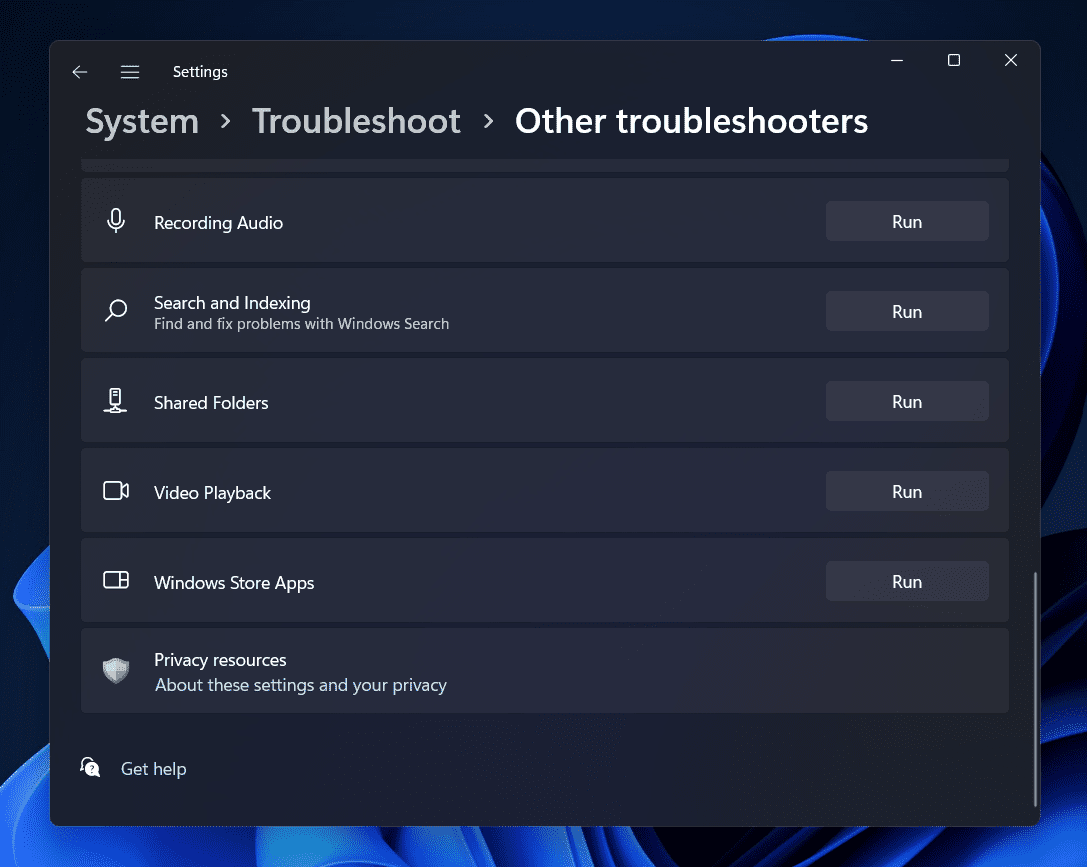
Open the Settings app by pressing the Windows + I key combo.In the Settings app, click on the Troubleshoot on the right side and click on Other Troubleshooters.
Click on the Run button right next to the Windows Store Apps to run the Windows app troubleshooter.
Follow the on-screen instructions to run the troubleshooter and fix the issue with it.
Try Repairing/Resetting The App
If none of it did help you, then you should try repairing or resetting the app. Given below are the steps to help you repair or reset the Snipping Tool app-
Search for the Snipping Tool in the Start Menu. Right-click on the Snipping Tool app from the search result, and then click on App Settings. Scroll down to the Reset section. Click on the Repair button to repair the app and fix issues with it.
This should fix the issue with the app. However, if the issue is still not solved, click on Reset to reset the app.
RELATED GUIDES:
How To Fix Windows 11 Blue Screen of Death ErrorsHow To Record Screen In Windows 11 How To Split Your Screen In Windows 11How To Rotate The Screen on Windows 11
Final Words
If the screenshot is not working in Windows 11, then this guide will prove helpful to solve the issue you were facing. Following the above steps, you will fix the issue you were facing while taking a screenshot on your PC.
Δ